Add Custom Branding to Your Office 365 Sign-in Page

Chris Goosen

In today’s cloud services world, organizations are always looking for ways to improve user experience while still retaining their corporate brand and image. Microsoft Office 365 has always offered some degree of banding for those who choose to implement Active Directory Federation Services (AD FS) for identity federation in their on-premises environment. And as one would expect, it has matured over time to become easier and much more feature rich.
Fortunately, organizations who have chosen not to use identity federation also have the ability to apply custom branding to the Office 365 sign-in page where users are redirected when they are signing in to Office 365 services. It often becomes a little confusing because this functionality is actually configured in Microsoft Azure, not in Office 365 and is provided as part of the Basic or Premium edition of Azure Active Directory. As you probably know by now, Azure Active Directory is the identity and access management service used by Office 365 and when you sign up for an Office 365 tenant an Azure Active Directory free edition instance is automatically created for you.
If you would like to take advantage of the custom branding feature in Azure Active Directory, you need to upgrade to either the Basic or Premium edition of Azure Active Directory. You do of course have the ability to sign up for a 90 day trial as well.
In this post, we will walk through the process of signing up for an Azure Active Directory Premium trial and how to add some custom branding to the Office 365 sign-in page.
I would like to highlight that sign-in page customization is done at a directory level, so if you have multiple business units that all make use of the same Office 365 tenant and thereby the same directory, you will only be able to add a single custom configuration and it will apply to all users regardless if they sign-in using different UserPrincipalName (UPN) suffixes.
Let’s assume you already have an Office 365 tenant and have added and verified a custom domain name. The next thing you will need is a Microsoft Azure subscription, if you don’t already have one created, you can easily do this by signing into Office 365 as a global administrator and then visiting http://manage.windowsazure.com where you should be presented with the following options:

Clicking the “Sign up for Windows Azure” link will take you through the process of creating a Microsoft Azure subscription.
Once your subscription has been created, you can navigate to “Active Directory” on the left-hand navigation pane where you will see your Azure Active Directory instance listed there.
Clicking on the name will present you with a getting started page where you can select “Try it now” to activate your Azure Active Directory Premium trial


Once your trial has been set up, the first step is to assign some licenses. At a minimum, you need to assign a license to your admin user. This is a very important step as the “Customize Branding” option will not appear in your subscription until your admin user has a license assigned as you can see below:

After license assignment:

Now that we have our Microsoft Azure subscription setup, let’s have a look at what can be customized. Looking at the default sign-in page, there are currently three areas that can be customized:

These are:
- Background Color and Illustration
- Banner Logo
- Sign-in Page Text
Each of these have specific requirements which we will now look at in more detail. Firstly, the background. You can upload a custom image which will be visible to users when signing in. The background illustration has the following requirements:
- 1420x1200 Pixels
- JPG or PNG image format
- 500 KB in size
You also have the option here of setting the background color by entering a RGB color in hexadecimal format (example: #000000 = Black), this is particularly useful of your background illustration has any transparent areas.
It is important to note that the image will be resized as appropriate in order to accommodate different screen ratios. Resizing will occur from the bottom right corner towards the top left so be sure to keep any important elements in the top left corner.
Next, you can upload your company logo. Similar to the background illustration, the banner logo has specific requirements:
- 280x60 Pixels
- JPG or PNG image format
- 10 KB in size
And finally, you have the ability to add some specific text to the sign-in page, this text will be displayed on the bottom right of the page. Only plain text is supported here, up to 256 characters.
Once you have decided on the appropriate customizations for your environment, you can click the “Customize Branding” button under directory properties in your Microsoft Azure subscription to make the necessary changes:

Once you have completed your customizations, these changes will be active immediately and you can easily test your configuration by using the following URL: https://login.microsoftonline.com/?whr=your_domain.com

The user experience varies based on device and access method. Accessing the sign-in page via the Office 365 portal at https://portal.office.com will result in the default Office 365 sign-in page until a username has been entered and home realm discovery takes place, at which point you will see your customized page. If the sign-in page is accessed via an Outlook Web App (OWA) URL, either the default URL http://outlook.office365.com/your_domain.com or via a custom one (using a CNAME record) like http://webmail.your_domain.com it will display your custom settings without the need for home realm discovery.
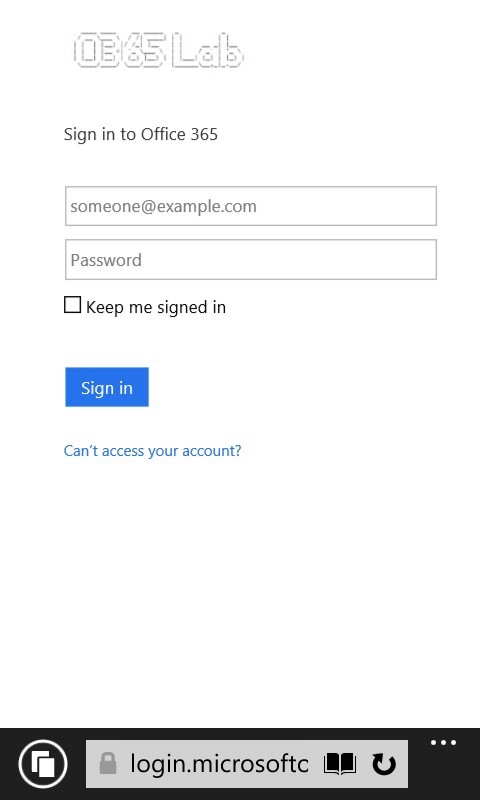
The sign-in page will be appropriately resized for the device it is being displayed on, here are some examples of the above sign-in page on Windows tablet and Windows Phone devices:


It really is that simple! You can change or update your customizations at any time by clicking the “Customize Branding” button again:

As you can see, the Basic and Premium editions of Azure Active Directory allow organizations to easily customize the Office 365 sign-in page presented to users when they are signing in to Office 365 services.

Chris Goosen
Office 365 MVP, Exchange MCM, Technology Consultant
Related Posts


Security Features Guide for Office 365 Administrators

Nathan O'Bryan MCSM
Office 365 is Microsoft's premier cloud service, and the clear leader in the "back office" server...
