Public Folder Scripts and Basic Authentication
By now you must be aware that Microsoft will turn off basic authentication in Office 365 later this...


SSL Certificates in Exchange are widely used, both for encryption of traffic as well as server authentication. Despite the fact they are widely used, a lot of admins still think certificate management is difficult (and expensive). But it is not, let me explain.
During installation of an Exchange server a self-signed certificate is created. This self-signed certificate contains the NetBIOS name of the Exchange server (for example, AMS-EXCH01) and the FQDN of the Exchange Server (for example, AMS-EXCH01.labs.local).
A self-signed certificate can be used for HTTPS troubleshooting purposes. It can encrypt the traffic between the client and the server, but when it comes to server authentication it will fail since the issuer of the certificate is not trusted by the client. You can work around this for internal clients, but for external clients this is not possible, let alone when configuring an Office 365 hybrid environment.
For SMTP it is a bit different since server authentication is only used when configuring forced TLS between different domains or between Exchange on-premises and Exchange Online. For daily use, a self-signed certificate can be used safely by SMTP, and TLS using the self-signed certificate is referred to as opportunistic TLS.
For HTTPS traffic a 3rd party SSL certificate must be used. There are several vendors in this market offering great SSL certificates, but personally I have very good experiences with Digicert certificates, so my blogpost is based on Digicert.
A typical Exchange server uses (at least) two namespaces for client traffic:
In Exchange 2010 the Exchange Management Console could be used to manage SSL certificates, but with Exchange 2013 and higher most work can be done using the Exchange Management Shell. Creating a new 3rd party certificate on an Exchange server consists of the following steps:
To create a request file called ssl-request.req open Exchange Management Shell on the Exchange server and enter the commands similar to the following:
$RequestData = New-ExchangeCertificate -GenerateRequest -Server AMS-EXCH01 -SubjectName "c=NL, S=Flevoland, L=Emmeloord, O=Jaapwesselius.nl bv, OU=RND, CN=webmail.exchangefun.nl" -DomainName webmail.exchangefun.nl,autodiscover.exchangefun.nl -PrivateKeyExportable $true
Set-Content -path "C:\install\ssl-request.req" -value $RequestData

The first command creates a new variable called $RequestData where SSL certificate information is stored in, the second command stores the contents to a file on the local hard disk. You can open the request file using notepad, but although it is clear text it is unreadable and does not make a lot of sense.
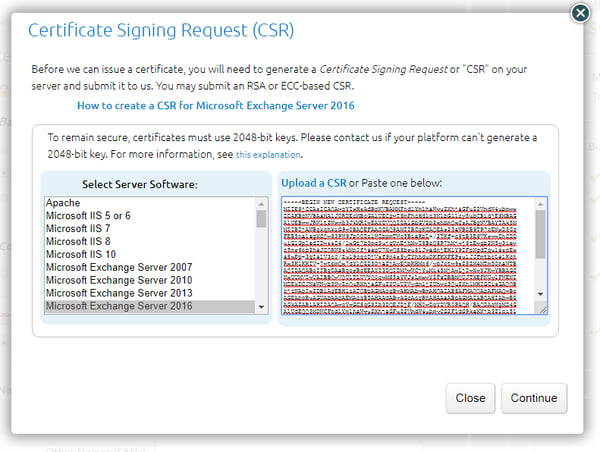
The next step is to order the new certificate with the vendor. Logon to the vendor’s portal and order a new certificate. To create a correct certificate, the contents of the request file as shown earlier should be imported into the request, something like the following screenshot:

After you’ve completed the order you must wait until the order gets approved, your request is validated and then the certificate can be issued. Timing depends a bit on your vendor and the type of certificate you have ordered, but I’ve seen certificates issued in 15 minutes, but also in three days.
When the new certificate is issued you can download it, store it on the Exchange server hard disk and import it. In Exchange Management Shell use the following commands:
$Data = [Byte[]]$(Get-Content -Path "c:\install\webmail_exchangefun_nl.cer" -Encoding byte -ReadCount 0)
Import-ExchangeCertificate –Server AMS-EXCH01 -FileData $Data
The first command reads the contents of the new certificate in a variable called $Data, the second command imports the certificate into the server’s certificate store. Please note that no password is needed at this point.

The last step is to bind the services to the new certificate. It can be bound to SMTP, IIS, POP3 and IMAP4, but in this example I will only bind it to IIS. To bind the Exchange services to the correct Exchange certificate you need the thumbprint of the certificate (copy and past from the output of the previous command). In Exchange Management Shell enter the following commands:
Get-ExchangeCertificate -Server AMS-EXCH01 -Thumbprint 225B26D7F8EF0721887213EEF71F87380DE8AEEE | Enable-ExchangeCertificate -Server AMS-EXCH01 -Services IIS
You are now ready to go. If you feel comfortable you can always execute the IISRESET command, but that’s not needed.
Once you have the certificate in place it’s a good idea to export it to a backup file (.PFX) and store it in a safe place, just in case you lose your Exchange server or when you want to import it into other Exchange servers or into your load balancer.
To export the certificate we just created execute the following command in Exchange Management Shell:
Export-ExchangeCertificate -Thumbprint 225B26D7F8EF0721887213EEF71F87380DE8AEEE -FileName "C:\Install\webmail_exchangefun_nl.pfx" -BinaryEncoded -Password (ConvertTo-SecureString -String 'Pass1word' -AsPlainText -Force)
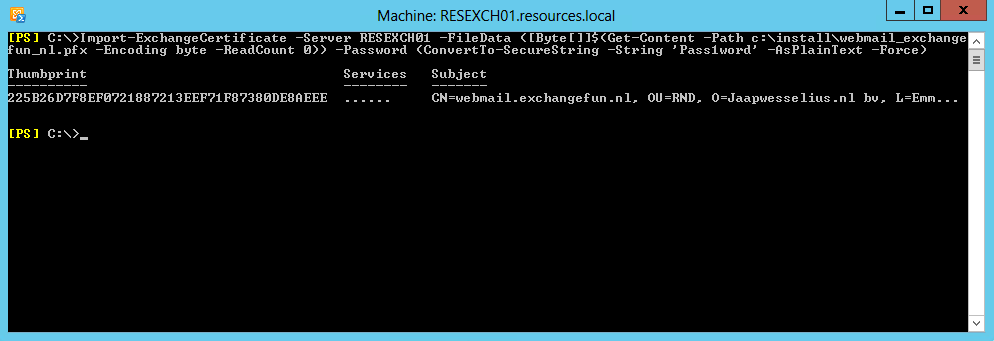
If you want to import the certificate into another Exchange server, in the example below an Exchange 2010 server, you can use the following command in Exchange Management Shell:
Import-ExchangeCertificate -Server RESEXCH01 -FileData ([Byte[]]$(Get-Content -Path c:\install\webmail_exchangefun_nl.pfx -Encoding byte -ReadCount 0)) -Password (ConvertTo-SecureString -String 'Pass1word' -AsPlainText -Force)

After importing the certificate, don’t forget to bind it to the services you want to it.
SSL Certificates in Exchange are used for server authentication and encrypting traffic. By default, each Exchange server get a self-signed certificate during installation, but for clients you need a proper 3rd party SSL certificate.
In Exchange 2010 you can use the Exchange Management Console to manage your certificates, but in Exchange 2013 and higher it’s best to use PowerShell to do this. In this blogpost I showed you how to create new certificates, and how to export and import them using PowerShell. I suggest you store the commands in a notepad file on your management server, can be useful. 😊
Watch all aspects of your Exchange environment from a single pane of glass: client access, mailbox, and Edge servers; DAGs and databases; network, DNS, and Active Directory connectivity; Outlook, ActiveSync, and EWS client access.
Get started with a free 14 day trial

Jaap is a Microsoft MVP for Office Apps and Services. Jaap is an independent consultant, primarily focusing on Exchange server, Skype for Business and Office 365.


By now you must be aware that Microsoft will turn off basic authentication in Office 365 later this...


Microsoft Exchange Server has been around for more than 25 years. To promote Exchange and to help...