Exchange Can't Start Due to Misconfigured AD Sites
Recently, a customer had issues with their Exchange server which didn’t start properly after...

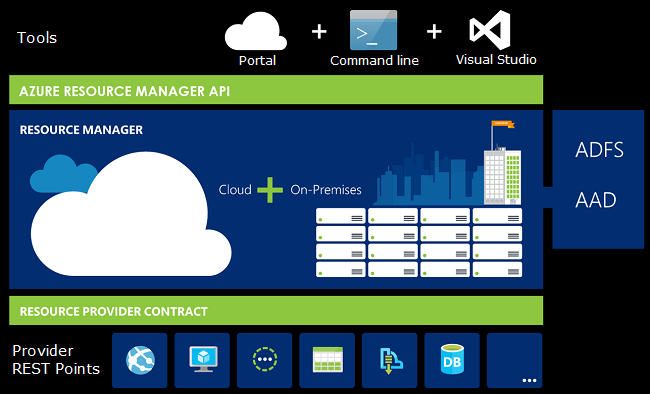
Azure Resource Manager (ARM) is Microsoft's platform for deploying and managing resources within Azure. ARM allows you to build resource deployment templates using PowerShell and JSON scripts to build repeatable and consistent deployments in Azure.
I figure it's time for me to learn how this whole Azure thing works, and the best way for me to get it all straight in my mind is to be able to explain it to you. Some of what I cover in this blog post may be a little basic, so if you’re already using ARM effectively you might want to skip to the next blog post.
In the end, this blog post looks different than I expected it would. As I started writing this one, I didn’t have much of a grasp on what ARM is and what it does. Now I feel like I’m starting to get my arms around it, and hopefully after reading this, you will too.
It is easy to log into the Azure portal and wonder “Where is Azure Resource Manager?” I must admit I did that myself. It’s easier to tell you where ARM is by telling you where it isn’t.
On the resource list, you’ll see many distinct types of Azure resources you can work with. If you look for “Virtual Machines” you’ll see two options: Virtual Machines, and Virtual Machines (classic). The “classic” choice does not include ARM, where Virtual Machines does.
In other words, ARM is the new resource management piece of Azure that works across all Azure resources, if those resources are in the new format.
Azure is a “datacenter in the cloud,” so ARM is the tool kit that allows us to control the resources within that virtual datacenter by giving us a framework for working with our Azure resources in a scriptable way.
We’ll have to get into the Azure web portal later, but I prefer to do as much of the configuration work in PowerShell as I can, so that is where we’re going to start.
The first thing you’ll need to follow along is the Azure PowerShell module. All Azure resources are available HERE. Once you install the Azure PowerShell module you can connect to ARM with the cmdlet “Login-AzureRMAccount.”
Once you’re authenticated, you can start working on deploying some resources. When you create an Office 365 tenant, that tenant exists in a specific region. This is not the case with Azure. Any single Azure tenant can contain resources in many different regions.
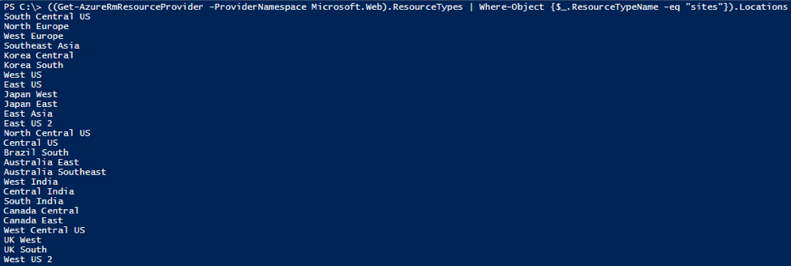
I could list the regions currently available, but those regions are constantly changing so I think it’s much more useful for me to show you how to figure out what regions are available at the time you are creating your resources.
Using the “Get-AzureRmResourceProvider” cmdlet will give you a current list of the regions available to you.
((Get-AzureRmResourceProvider -ProviderNamespace "Microsoft.Web").ResourceTypes | Where-Object {$_.ResourceTypeName -eq "sites"}).Locations
Next let’s create a resource group. Resource groups allow you to keep your Azure resources together for ease of administration and billing. “New-AzureRmResourceGroup” cmdlet allows you to create a resource group to play with.
New-AzureRmResourceGroup -Name "test" -Location "West US 2"

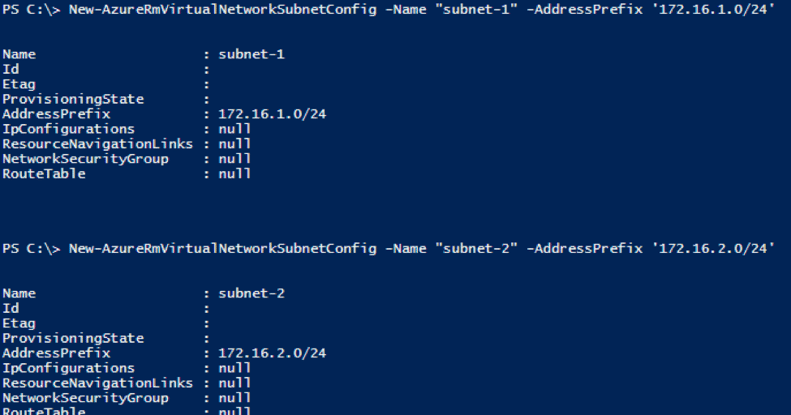
Next, we need to setup some basic networking resources. Here we create two subnets.
New-AzureRmVirtualNetworkSubnetConfig -Name "subnet1" -AddressPrefix '172.16.1.0/24'
New-AzureRmVirtualNetworkSubnetConfig -Name "subnet2" -AddressPrefix '172.16.2.0/24'
Then we create the virtual network.
New-AzureRmVirtualNetwork -ResourceGroupName $resourceGroup.ResourceGroupName -Location $resourceGroup.Location -Name "vnet-1" -AddressPrefix '172.16.0.0/16'

Finally, we need to create a storage account.
New-AzureRmStorageAccount -ResourceGroupName "Test" -Location "West US 2" -Name "stract231" -Type Standard_LRS

You’re still all connect to ARM with your PowerShell connection, so let’s run the PowerShell cmdlet to deploy a new virtual machine…
It’s uh…
Hummmm.
Turns out there isn’t a PowerShell cmdlet for “New-AzureRmVirtualMachine” to deploy a new virtual machine in ARM. You can deploy a new VM with the “New-AzureRmResourceGroupDeployment” cmdlet, but the parameter to define your virtual machine is -TemplateFile that you use to point to a JSON template.
I’m going to save setting up a JSON template for my next blog post, so that leaves us with two other options to deploy a virtual machine.
Option 1 is to use the Azure portal GUI. I’m going to assume you can make it though the add virtual machine wizard, so I’m not going to dedicate a bunch of space to that.
The more interesting option, in my not-so-humble-opinion, is the Azure quick start template gallery. Here you will find over 500 (as I’m writing this) community-built JSON templates to deploy virtual machines into Azure.
There are a bunch of templates you can use for test deployments. I just chose the simplest template I could find for my first test. Pick a template you like, and let’s have a look at what’s there.
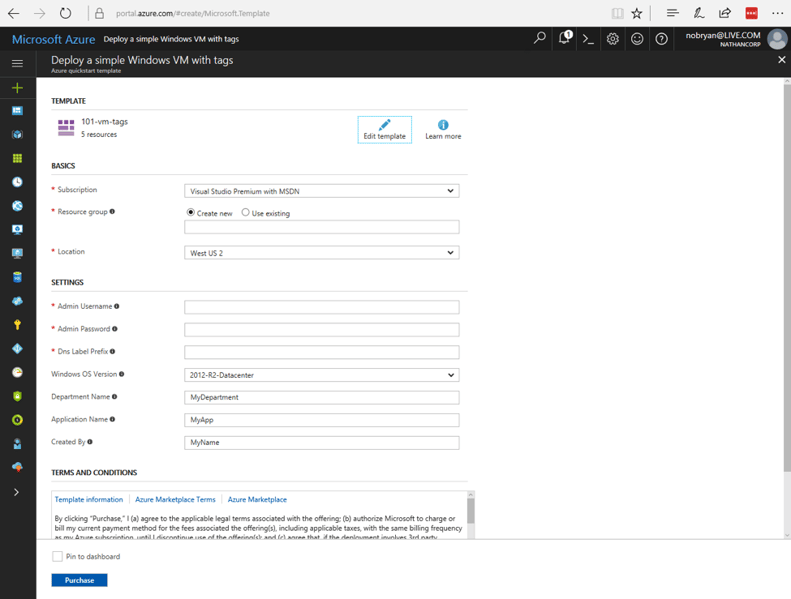
Looking at that page, you’ll see a cost estimator (shows you about what this VM will cost if you leave it running 24x7), a link to deploy this VM to Azure, a link to the GitHub repository for this template, and PowerShell cmdlets to deploy this template. It’s all very straight forward to use, and I highly suggest you play around with a couple of test deployments to get the hang of it.
The Deploy to Azure link gives you a simple one-page wizard to fill in details for this template and deploy the virtual machine into your Azure portal. You can use the resource group, network resources, and storage account we setup earlier to support this virtual machine.
ARM is a powerful set of tools for managing your “datacenter in the cloud,” but like anything else it takes a bit of work to grok.
The plan for my next blog post here is to create a GitHub repository and create a basic template of my own. If you have any specific request for things I should include, feel free to post them in the comments below.

Nathan is a five time former Microsoft MVP and he specializes in Exchange, Microsoft 365, Active Directory, and cloud identity and security.
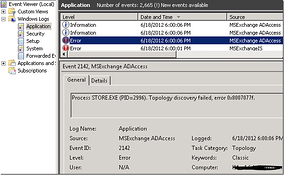

Recently, a customer had issues with their Exchange server which didn’t start properly after...

Last year, Exchange Server MVP Mike Crowley wrote a script which would interactively report on the...