Advanced Security Management in Office 365 — Part 2
In the previous part of this series, we did a short overview of the Advanced Security Management...

In a series of articles here on ENow’s blog over the past few months, we covered a wide variety of security and compliance-related features in Office 365. Those included improvements in SharePoint Online and OneDrive for Business, the Preservation policies, Azure RMS auditing, Activity Alerts and more. It only seems logical to end the series by reviewing the newest product, one that promises to take care of all your auditing needs. In this article we will take a look at the Advanced Security Management feature and introduce you to the functionalities it brings.
Advanced Security Management (ASM for short) was released a few months back as part of the E5 plan. If we go further down the memory lane, it all started with Microsoft’s acquisition of Adallom a year ago. The Cloud App Security suite of services, officially released in April, was the first “fruit” of the acquisition, followed by ASM in June. ASM is, in fact, a stripped-down version of Cloud App Security, focused only on Office 365, as indicated by the portal URL or the actual SKU part (“ADALLOM_S_O365”).
In a nutshell, ASM allows you to configure Policies based on user activity or predefined, algorithm-driven detections (in other words, the trendy machine learning). Apart from simply notifying you, ASM can also be configured to act upon triggering such detection by suspending the user account. Lastly, it can be used as your central repository for storing audit data and getting useful insight on the Office 365 usage in your company.
In order to be able to do this, ASM “crawls” the logs provided by the unified auditing infrastructure in Office 365 and copies the relevant information to its own servers. An enhanced user experience is provided via the feature management portal, which we will review in the next section.
ASM also comes as a standalone plan that can be purchased for $3 per user per month (that’s €2.50 user/month for EU folks).
Because ASM relies heavily on the auditing investments Microsoft has made in Office 365, some prerequisites are needed for the service to function properly. Obviously, you need to allow the collecting of audit events in the tenant along with ASM access to the logs. This is done by accessing the Security and Compliance Center (SCC), expanding the Alerts node and selecting Manage advanced alerts. Select the Turn on Advanced Security Management for Office 365 checkbox and then press the Go to Advanced Security Management button. Detailed instructions and screenshots can be found in this article. You might want to bookmark the following link for quicker access to the ASM portal: https://portal.cloudappsecurity.com/
The first time you open the ASM portal, you will be greeted by the screen shown on the image below:
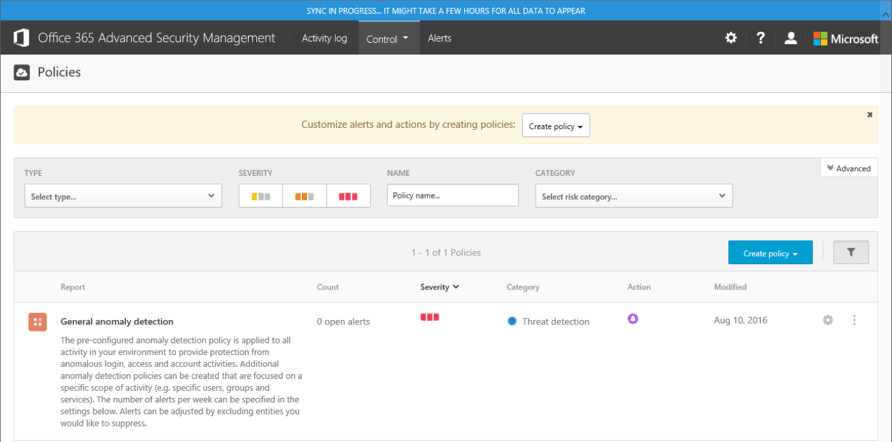
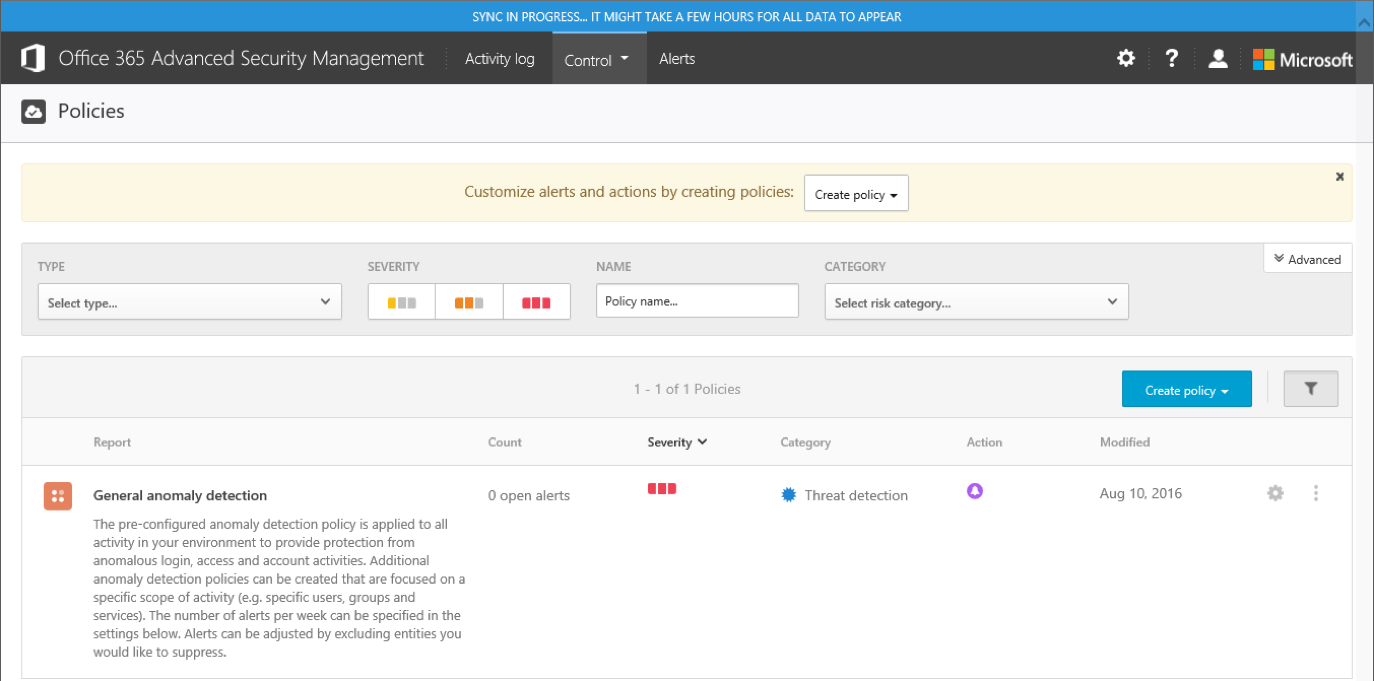
Because this is a brand-new tenant and ASM was just enabled, we get the blue notification bar on top alerting us that it will take some time for the portal to start working as expected. We are taken directly to the Policies tab, where we can see the default “General anomaly detection” policy, configured to generate portal Alerts for any suspicious activity. We will discuss working with Policies and Alerts in the later sections of the article.
We are also presented with a “quick start” banner, which can easily be dismissed to free up some screen estate. Let’s however switch to an older tenant, one that has ASM running for a while, and take a quick tour of the portal.
As the screenshot in the previous section shows, the landing page for the ASM portal takes you to the Control tab, more specifically the Policies page, where you can see all the currently configured policies. There are two types of policies you can create: Activity policies, which fire upon detecting specific types of user actions, and Anomaly detection policies, which are generated when some sort of anomalous activity is detected (for example, the “impossible travel” scenario). A quick selection of filters is available, which allows you to find a Policy by its Name, Type, Severity or Categorization. Pressing the Advanced button will also give you the option to filter policies based on the Template used to create them.
Speaking of which, apart from Policies under the Control tab, you will also find the built-in Templates. They are basically predefined policies, which serve as examples on what you can achieve with ASM and can also be used to quickly create a new policy. By default, a total of 6 templates are available, including the following:
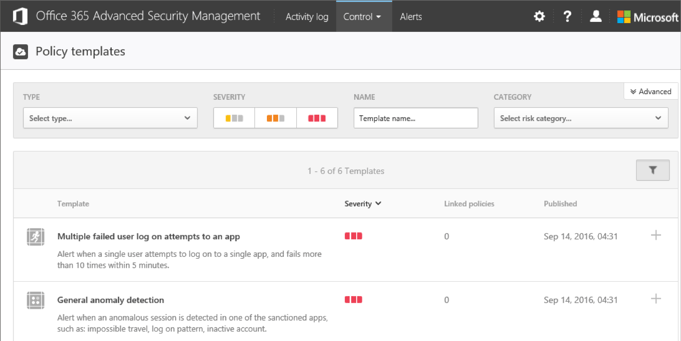
As with the other sections in the ASM portal, quick filters are also available here. You can also see the number of Linked policies, i.e., the number of Policies created based on a given template. Clicking the number (if different from zero) will take you to the Policies tab, filtered by the matching Template. Lastly, a button to quickly create a new Policy based on a Template is available on the right-hand side.
The Activity log tab offers the list of all audited events that have been imported to the ASM console. It’s the same info you would find under the Audit log search section in the SCC, only presented in a different UI. The Filtering capabilities here are much more powerful compared to the SCC. However, a major downside is the fact that the dropdown menus offer a very limited number of entries to select from. We are given a search option, but this only helps if we know what we are looking for. There’s no help article detailing all the activities monitored by ASM, and while we can use the Audit log events in the SCC as a cheat sheet, many of the events have different names in ASM. In effect, preparing your filters can be an unpleasant experience, even more so if you are trying to filter out multiple event types.
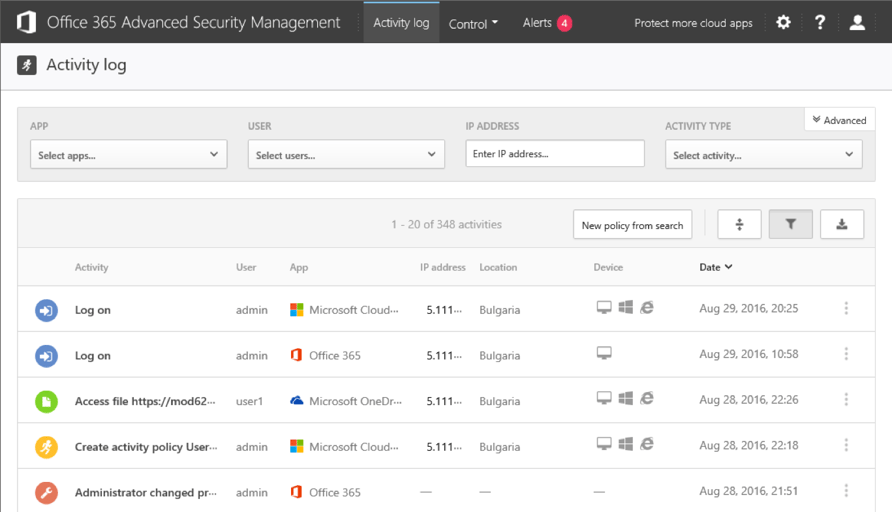
On the bright side, there are multiple “quick filter” options built in the UI. For example, clicking on a username will bring all the user’s activities. Pressing the three vertical dots on the right-hand side pops up a menu allowing you to filter based on the activity type, IP address, country or user. There’s also a button to quickly create a New policy from search, as well as buttons to toggle the filters, switch between basic or advanced filters, collapse or expand the listed entries and Export the results in either CSV or Syslog format.
The last tab gives you a quick overview of all the Alerts generated by the default and user-created policies. This will probably be the most used section of the portal as it allows you to review any infractions, as well as to quickly act upon a detected anomaly. Again we have a wide variety of filtering options, as well as the option to Dismiss or Resolve and alert. We will return to this part of the portal in the next section.
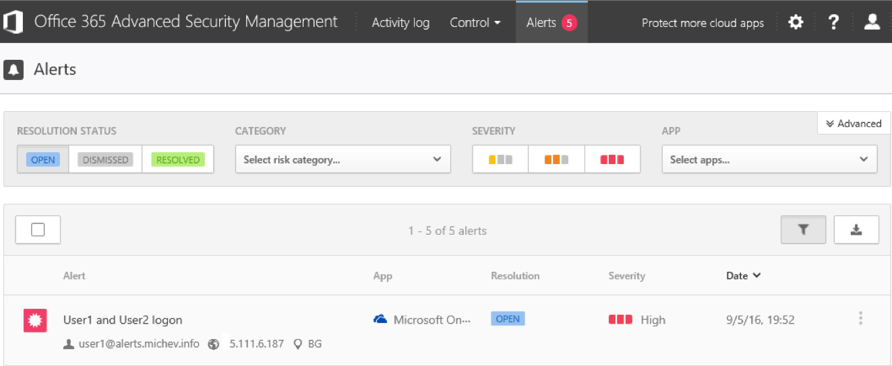
Few other UI elements are worth mentioning. Under the cog wheel, you can access the Governance log, which lists all actions taken by policies or manually by admins. You can again filter by a large set of criteria, such as the Policy name. An interesting glitch in the UI is that the “Action type” filter lists an extensive number of actions, the majority of which are simply not available to use with Office 365 ASM. It’s a work in progress, as mentioned throughout the review.
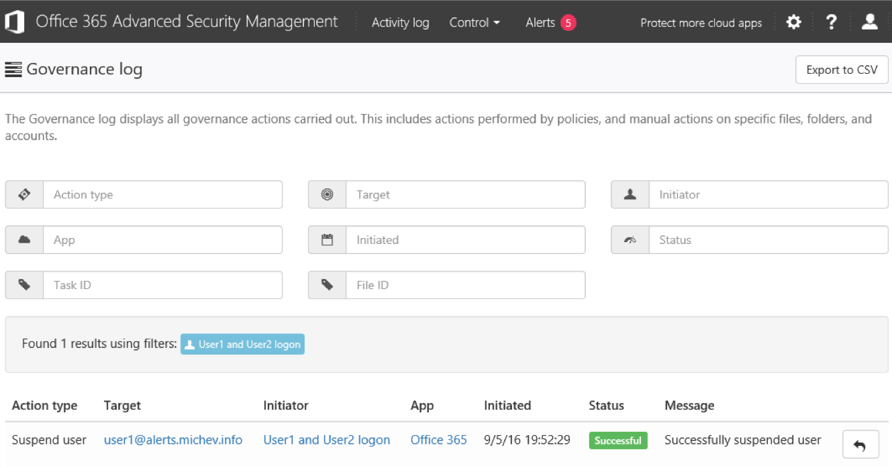
More details on the Governance log can be found in this article.
Under the cog wheel menu, you will also find the list of IP address ranges, where you can define and classify different subnets or even single IPs. A wide variety of classification options are available, as detailed in this article. You can later use those as matching or filtering criteria for your policies and generated alerts.

Overall, you should find the UI pleasant on the eyes and easy to use. There are some other issues with it worth mentioning, such as the lack of integration with the Office 365 suite. There’s no App launcher, for example. Branding will also not get applied, and the Help section leaves a lot to be desired. On the Policies list, enabling/disabling a policy simply dims its icon, which is easy to miss as far as indicators go. Some other minor annoyances can be spotted around the portal, all of which I’m sure will be addressed in the future.

Vasil has been actively involved with Office 365 for over four years now. He spent over an year as Support Engineer for Microsoft Online Services with one of Microsoft's vendors, working with BPOS and Office 365 customers. Switching sides, he later held support positions with several multinational enterprises, before finally moving to a consultant role. This varied experience allows him to have an unique perspective on the ins and outs of the Office 365 suite. He has closely followed the evolution of Microsoft's cloud offerings, starting with BPOS, with expertise covering all stages of the Office 365 lifecycle. He holds a charter member certification for Office 365 (MCITP and MCSA), and has been awarded as Microsoft MVP for second year in a row.

In the previous part of this series, we did a short overview of the Advanced Security Management...


A few months back, we did a short introduction to Advanced Security Management (ASM), a...